Regulation of the parking galley drive.
Auto gadgets and productsIf there is evidence of scoring on the working surface of the disk, there is a serious risk of other defects, which will increase the wear of the pads and reduce the efficiency of plating, as well as if the drum beat of the disk is moved, and the vibration will occur. and when galvanizing, replace the disk. For forward reversal correctness of drive regulation Galma parking
Raise the drive until it stops, which will require approximately 3-4 clicks of the ratchet device.
Manual adjustment

 If the volume of clatter does not fit with the interval indications or if the car is not satisfied with the pressure of parking, adjust the drive. Regulatory vehicle to the drive of the parking lot of the roztashovaniy in the salon under the lined tunnel under the lining. You will need a “10” wrench (small socket head). Dali: If it was possible to work, the drive was adjusted incorrectly or malfunctioning.
In this case, repeat the adjustments, ending with your attention. If repeated adjustments do not produce the desired result, turn over the mounting block galm mechanisms rear wheels, galm discs
and cables to the drive.
Replace faulty parts and adjust the parking brake drive as described above.
Install the cover for the parking galley drive.
The Opel Astra J car is gaining popularity on
- Russian market
- .
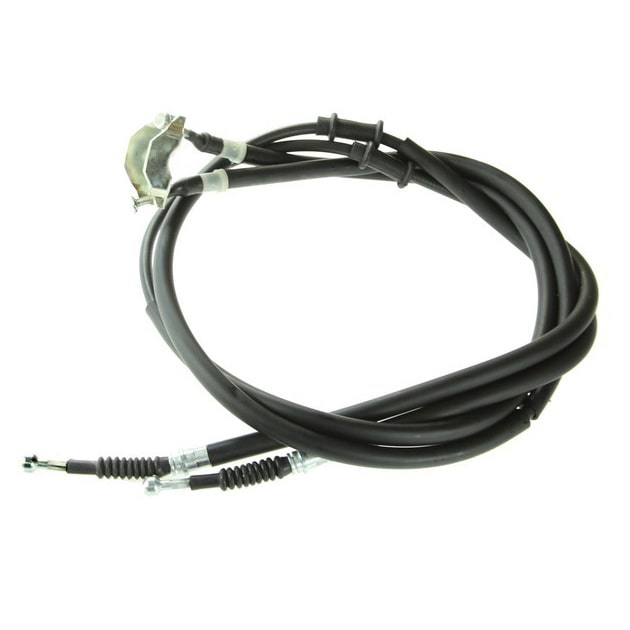
This article is dedicated to his work galm system And for those problems that require replacing the handbrake cable. Car repair Opel Astra J You can install an electric drive in the parking lot.
In what situations is it necessary to replace the handbrake cable on the Opel Astra J?
- The parking noise does not reduce the car's deflection by 25% when moving the weight in the passenger compartment by 7-9 teeth (clacking) of the ratchet device;
- The frequency of fixing the handbrake at the hour of departure;
- When you release the handbrake, you need to exert a lot of force to lift it and press the button.
 Most of all, in all cases there is a sign of a breakdown of the parking brake system; the cause of the malfunction lies in the immediate situation: it may be a break in the handbrake cable, due to natural wear or extreme pressure.
The only correct solution is to change this technical element.
On Opel Astra J cars, replacing the handbrake cable is not difficult and is well done by our masters, and in short, you can trust it to the most experienced professionals at our car service center.
 Specialists should select the required cable specification and contact a reputable manufacturer.
It’s difficult to work on your own, because for some car models there is a real shortage of parts.
IMPORTANT!
It’s a great benefit that if you don’t use the manual parking brake a little, you will save the integrity of the cable. Beware of a reversal trend: the elements lose their looseness in the casings, as they are low-friable, and therefore can jam and break off more often, especially if there is a sharp rush in the place. Cars occupy a decent position in the budget, since the procedure is on a local scale, such as replacing the handbrake cable of an Opel Astra J.
UVAGA! These car owners engage in work on their own, without remembering that in this situation you are causing insecurity not only for yourself, but also for other participants in the movement. It’s much better to go wild until it’s proven wrong
 service center
- where the price is clearly in line with the high level of service.
- Our car service offers its clients a favorable price policy for repairing Opel Astra.
- How did we achieve such results?
High qualification of the masters.
Yakysny auto parts
Search for the optimal price match. From now on you can select spare parts of different types: from different companies, regional manufacturers. Guarantees of the quality of our car service
Our car service center is responsible for servicing and repairing any Opel systems, including replacing the handbrake cable.
Our car service center provides guarantees for spare parts and their installation.
PORADA. Before that, how to take your car away
technical service
, then read and understand the guarantees offered by the manufacturer of spare parts, both changes and terms of work.
Please remember that the car service center does not provide a guarantee on the parts supplied by the repairman himself.
In this case, the versatility of the device is limited by the installation of parts. Our diagnostic technicians are always ready to advise you on the drive and repair of the Opel Astra manual cable and schedule an appointment for diagnostics at a moment's notice. Models with rear drum trims
Ruchne galmo
Therefore, in a normally adjusted state, self-adjustment of the rear lining pads occurs.
After completing the adjustment, turn the manual rope cables to the highest speed and apply a little grease to the parts of the adjusting device to prevent corrosion.
It is necessary to install a heat shield for the exhaust pipe.
Models with rear disc trims
Place wedges under the front wheels, jack up the rear part of the car and securely secure it to the racks under the axle.
Remove the rear wheels.
Pull the hand strap to the other tooth on the ratchet.
On models with a catalytic converter, unscrew the nuts and unscrew the heat shield of the central section of the exhaust manifold.
Loosen the nut on the cable adjustment device.
Insert the screw into the opening of the adjusting mechanism in one of the disks and turn the adjusting handwheel until you feel the friction of the rubber pads and the disk turning around with your hand.
Turn the adjusting handwheel back so that the disc can turn around completely.
Repeat these operations on the other wheel. Tighten the nut in the adjusting mechanism of the cable so that Galmin pads
start practising.
Quilt the pads on both wheels properly.
Release the galmo manually and tighten it again.
The discs are likely to become blocked if the hand strap presses against the 6th tooth of the ratchet.
Whenever necessary, adjust the position of the nut of the adjusting mechanism.
If necessary, install a heat shield for the exhaust line.
Install the road wheels and lower the vehicle to the ground.
1. Adjustment is carried out regularly prior to the On-line Maintenance Schedule (), as well as every time after replacing or removing/installing rear lining mechanisms, pads or discs.
At service stations for adjustment, use a special key HAZET 4965-1.
Models Astra
2. Remove the lid of the diagnostic socket under the parking level.
7. Support the front wheels with wheel chocks, jack up the rear of the car and place it on supports.
8. Press the key down to 2 clicks, then tighten the adjusting nut until the rear wheels are fully engaged - you will lose the ability to turn them manually.
If the rear wheels are at fault for spinning with the same support, otherwise you will lose the freedom of movement of the drive cables at their wheels.
9. It is important to drive until the third click - the rear wheels will lock completely.
It’s important to let go – the wrong wheel begins to turn around freely.
Repeat the adjustment as needed.
10. Lower the car onto the wheels, secure the parking brake in the center console and install the diagnostic connector cover in place.

11. To allow the trim pads to rub in, drive the vehicle for approximately 300 m at a low speed and lightly parked trim level.
Models Zafira
12. Release the parking lot and remove the cover over the diagnostic socket on the center console (see supra. illustration).
13. Remove the dry cup (see illustration 12.12) of the rear threaded rod and unscrew the adjusting nut until the end of the threading stroke.
14. Release the foot pedal no less than five times until the pedal stroke becomes stable.

After skin pressure, the galvanic pedal must turn around in the release position. 15. Support the front wheels with wheel chocks, jack up the rear of the car and place it on supports. 16. Tighten the adjusting nut so that when the parking brake is released, the distance “a” (div. sup. illustration) between the final stop of the parking brake and the support stop of the caliper becomes 0.1 mm.
The same measurement on the caliper of the other wheel is responsible for an increase of 0.1 mm.
